Putting on the Foil Coach
At the suggestion of Judy who blogs at Grandparentsplus2, I snagged one of those extra foil space blankets that I had in an old hunting pouch and re-purposed it for my seed starting rack. Now I am not sure that I will ever be able to get this thing back in it’s tiny pouch after this but we will see if this helps reflect more light onto the seedlings.

Below the Peas are starting to get tall.

The onions are starting to get bigger, and I must admit I sprinkled the rest of the seed packet into the peat pots in hopes of increasing my onion density.

The Cilantro has started to poke out of the pots.

Below the Pansy’s have sprouted.

Below in the orange tray the Black Eyed Susan’s have sprouted as well as some Lupine and Echinacea seedlings.

I have held off a little on starting more plants until we see if winter is almost down. Despite a warm up this week we still have a deep snow pack and tall snow banks here. Depending how this weekends boiling goes, I may start some more plants with the kids, but we will have to wait and see…
Share this:

More seed starting!

Well I screwed up the onions, and my pea plants may be growing a little too quickly for the amount of snow we have piled up outside! Anyhow, since I last planted my onions I have learned that you really want to plant onions in a flat so that they grow almost tight together like grass. When you are read to transplant you then pull each little onion start out of the flat. Its painstaking work but supposedly good. We will see and I may have to get some sets as well, just incase. My older seeds of parsley and pansy’s never germinated, so I emptied those pots and figured I would replant something else in them.

So above you can see that I have all these tiny little onion plants, basically one offs in each peat pot. They have lots of room to grow I guess.
I made it out to the store yesterday and picked up a couple more seed trays and some green plastic pots so I can plant the next round of plants. On tap for tonight we planted a new seed packet of pansy’s, lupine, black eyed Susan’s, Echinacea, some cabbage, and some slow bolting cilantro. We will have to see how my next round of seedling starts take off. Due to the polar vortex and deep snow pack I pushed all my seedling start times off a week. Let’s see if it helps! The next round of seedlings.
S
Share this:

Seed Delivery
I received my order from Seed Saver’s Exchange and I found a nice little surprise waiting for me upon opening up my package.
A nice little thank-you of a complimentary seed packet! Now I am not exactly an eggplant aficionado, nor have I ever grown an egg plant, but I must say this was a pretty neat thing to receive. I am looking forward to learning about eggplant and sowing the seeds this spring!

To round out my new seeds this year, we are trying a yellow watermelon, and edamame in addition to our standard fair. If only the polar vortex would let up it would be easier to think spring and all of the sugaring and gardening we will be doing!

Share this:

July Garden Update
With the first of July here, summer is in full swing. It’s hot and humid out there and despite the seemingly never-ending evening rain and thunder showers, it is still slightly uncomfortable. However, on the bright side I have not had to water nearly as much as I have in the past. The heat and the rain have been very beneficial to the garden. I don’t remember us being this far along with many of the vegetables, especially the tomatoes!

The three tomato plants we have out front have gotten so tall, we had to pick up some 6’-0” plastic stakes to help them support themselves. We actually had one of the plants bend over on one stalk during a recent bought of windy weather. In the past we have never had them go to far over their tomato cages. They are fruiting really well. I believe we have a Grape tomato, a Beef-steak tomato, and an Early Girl tomato plant, all of which are tall and have set fruit.

Above are carrots are coming along well on the left of the photo along with some lettuce on the right. We actually lost a couple lettuce plants to some type of creature, what it is we are not sure but a couple of the plants were dug up, and nothing else was touched. It seems like the strawberries and this lettuce bed were the only casualties from wildlife so far!

Another lettuce bed, I am not sure if it is the seeds being several years old or if this bed has an issue. We have tried in the past to grow tomatoes and zucchini in this bed to no avail. This year I figured we would try some lettuce and things are growing but not like we have seen in the past in our other beds. Look like I will throw some beans in this bed after the lettuce.

Bush Beans! I took our first harvest of beans, about a handful, the other ay to eat. This is the earliest I have had beans and it seems that planting the bush beans in addition to the pole beans really seems to help prolong the harvest by having the bush beans early and the pole beans late!

 Our first harvest of beans was from four Contender Bush Bean Plants.

The best garlic bed. I have removed the scapes previously, a topic for another post, and am waiting patiently for the garlic to be ready for harvesting. I believe late July or early August is when the garlic will be ready, but I will need to confirm.

The garlic scapes were very enjoyable in an Asian Stir Fry. I cut over 50 off our hard neck garlic!

Red Potatoes – These potatoes are going bananas, so much so I had to add another tier to the 6’-0” long by 12” wide box! Here’s hoping we will get a decent yield, from these tractor supply potatoes.

The blueberries are still not ripe, but they are starting to turn a little bluer each time I looks at them. If we could get some sun, instead of all the rainy overcast days, I bet they would ripen. Shouldn’t be long.

The bean trellis. Two weeks ago I hung some twine from the bean trellis and started training all the plants to climb and we have lift off. No beans, and as you can see I have a lot of clover to remove!

Some of last years raspberry canes are fruiting. The first fruits don’t quite look like store bought, but this is a wild raspberry plant we found in another part of our yard and transplanted last year.

From the photo above you can see how tall next years canes are in the center right of the photo. These new canes are almost as tall as the t-posts. Hopefully this bush will continue to fill out the niche we have started to cultivate for it and provided us with a third source of fruit at our house.

Although hard to see, the asparagus crowns we planted are doing well. I think 50-60% of the crowns we planted have sprouted a single lone stalk of asparagus that has ferned out. It’s interesting because some are tall and spindly and others are short and bushy. We will have to see what happens next year! The majority of green in this photo is our onions. Surprising they are doing quite well. We have had a hard time growing onions from sets, but we may appear to be getting one or two onions this year. We have had one hiccup where two of the plants have flowered. From what I have read once and onion flowers it stops producing a bulb. I will need to pull one to confirm!

Last but not least the peppers, we have several varieties and most of them have started at least a couple peppers. It looks like we still have a ways to go before harvesting, but it’s always a great thing to see your plants fruiting!
Share this:

Garden Bench 3.0

Just a quick re-cap of the tools and costs associated with this project in true “how to” “DIY” blogging fashion.
To learn more about the process you can refer to Building a Garden Bench Part One or Building a Garden Bench Part Two.
Tools needed:
- Various hand tools (hammer, chisel, pencil, quick square, framing square, rasp, pencil, 24” bar clamps, ratchet & sockets)
- Drill bits (3/16” standard drill bit, 3/8” standard drill bit, 1-1/4”spade bit)
- Power tools (10” sliding chop saw, skill saw, drill)
Materials:
| Description | QTY | Unit Cost | Total Cost |
| 4x4x8′ PT | 2 | $ 7.97 | $ 15.94 |
| 2x4x8′ PT | 1 | $ 3.77 | $ 3.77 |
| 2x8x8′ PT | 4 | $ 9.97 | $ 39.88 |
| 3/8×3-1/2″ zinc carriage bolts | 4 | $ 0.61 | $ 2.44 |
| 3/8×5″ zinc carriage bolts | 20 | $ 0.75 | $ 15.00 |
| 3/8″ hex nuts | 24 | $ 0.11 | $ 2.63 |
| 3/8″ flat washers | 24 | $ 0.13 | $ 3.11 |
| TOTAL MATERIALS | $ 82.77 |
Labor:
This was a tough one because there was a lot of starting & stopping but I would guess if you include the time taken to pick up the lumber, all the iced coffee breaks, and then the time it took to move this beast into position I bet you have 6-8 hours in this project. Probably less if you aren’t as easily distracted as I was by the garden and other chores around the house…
Share this:

Garlic From Planting to Garlic Scapes
After consistently inspecting the cold hardy garlic I purchased last fall from the Maine Potato Lady, and planted last October I finally saw what I have been waiting for. GARLIC SCAPES!

They are hard to see from as they are just starting out, but anyone who knows garlic knows what they look like. Last season my soft neck garlic that I planted was a pitiful failure and I had one scape and it ended up getting stuck half way up the garlic stalk before bulbing out and exploding the stalk. This year with the right garlic seed for our agricultural zone we are seeing dramatic differences. Below is a quick re-cap of where we started last October and where we are at the middle of June.
The 2012-2013 Garlic Season:
With bird hunting over, we planted garlic on October 30th, 2012. I had ordered two varieties in the late summer from the Maine Potato Lady. They were the smallest size package available and the varieties were Russian Red & German Red. The beds were prepared and we put the garlic in the ground. The beds were mulched with shredded leaf litter and left until spring.


Right Around the last week of March 2013 or the first week of April, we lost most of our snow on the garlic beds, so I pulled away the leaf litter to exposed some of the soil in the raised beds. Within a few days the first signs of life from the garlic beds appeared.

By April 20th things were really starting to sprout!

Almost a month later the garlic and shallots were looking pretty green, and it looks like I possibly know what I am doing growing garlic here is New Hampshire!

A couple weeks later and the Garlic plants are standing 12”-18” high above the raised bed boxes.

June 15th and the two hard neck garlic beds which are the two left most beds are doing great. The soft neck beck which is the right most 4×4 be is looking sparse and yellow.

And today June 17th we have most of the Garlic plants with 4-6” scapes starting to push out. Hopefully this garlic tastes good and we produce a couple of sizable garlic bulbs that we can use as seed garlic for this fall!

Share this:

Around the Garden
This week around the garden some earlier plantings of seedlings are starting to take hold. There are not a lot of words today but several photos which show the growth that we have been experiencing. The sunny weather and occasional rainy day has really helped our garden.
Our carrots below are starting to spout and probably should be thinned.

Below one of our boxes of red potatoes is really starting to sprout. I need to find another layer of 1x so we can add some more dirt and continue hilling the spuds!

Below most of the hard neck garlic have started to produce their garlic scapes. With any luck they will develop their curly Q shape.

Below is one of the Nasturtium plants I stated from seed. Its getting bigger so maybe it will flower at some point.

Some of the wife’s tomato plants have started to set fruit.


The Kentucky Pole beans have started to climb.

The blue berries are starting to turn a slight shade of blue! it won’t be long now and we are almost out of our June Strawberries.

The pepper plants have started to set fruit

And my Dahlia has several buds with a few that have decided to flower today.

Share this:

Garden Bench 2.0

Assembly of our garden bench continued this morning. I continued to follow the plans mentioned in my earlier post, but given my realization that everything on the internet may not be true, I took a little more time laying things out rather than trusting measurements provided by the original site.
 With an iced coffee almost complete and my two helpers chomping at the bit to hammer things we were off and running. The first step was to drill a pilot hole for the the 3/8” carriage bolts that would hold the legs together. I did each joint separately making sure everything was tight and set the way I wanted it prior to drilling.

After drilling the 3/16” pilot hole through the joint, I flipped the leg assembly over and used a 1-1/4” spade bit to drill a counter bore that was about 1/2” deep. The purpose of this counter bore is so that the bolts, nuts and washer will be recessed in the wood and not protrude out from the face of the 4×4’s. With the counter bore complete I than drilled through the pilot using a 3/8” bit which is the same diameter of the carriage bolts.

Once the drilling for a single bolt was done we drove the carriage bolt in, flipped the leg assembly over and place a single washer and hex nut on the bolt.

The 1″-1/4” spade bit gives just enough room for the washer and the nut. It’s also the widest bit you want to use because you will eventually be counter boring on the 2x stretcher for the seal which is 1-1/2” thick so it gives you solid 1/8” of material on the sides of the counter bore.

There was a lot of drilling, hammering, and fire trucking on this project. With the legs bolted together I got to work on the seat. I mocked up the bench prior to drilling any holes to get the space of the 2×8’s on the seat and back part of the bench. I started with the first board of the seat pushing it to to the seat back 4×4’s. with that in place I took some 3/4” scrap boards I had laying around and arbitrarily chose that as my spacing between the boards. I laid the entire bench out with 3/4” gaps and liked the look so we started drilling using the same process as above.

First drilling a pilot hole through the lumber.

Than a counter bore with the spade bit.

Next drilling the full diameter of the carriage bolts (3/8”).

None of my drill bits were long enough to go all the way through the 2×8, I think I had a max depth of about 4”, so I then had to unclamp the 2×8 move it out of position and finish the 3/8” hole going only though the 2×8 like in the photo below.

When all the holes were drilled I simply tapped the 4” carriage bolts into the 2×8 hammering one bolt on each end about a 1/2” beyond the 2×8. This allowed me to align the bolts with the holes I drilled and a few quick taps and the 2×8 was in position.

Flipping the bench over it was a simple matter of placing a washer on the bolt and tightening the nut.

This is a sturdy heavy bench that serves as a jumping off platform and should hopefully last a long time…

Share this:

Garden Bench 1.0

We got an early start to the day this morning, the kids were up at 5:30AM and ready to go. We hung around the garden a bit weeding waiting 7:00AM to hit so we could fire up the power tools. I guess I was trying to be neighborly. Anyhow we had picked up the lumber and hardware needed to make the garden bench on Friday night in preparation for a project weekend! From my original post you can get a link to the website where I found this totally fab garden bench. One word of caution, I think the 30-degree angle on one of the pieces is off. If you read the instructions you will know which piece I am referring to.
Today’s goal was to get all of the wet 4×4’s cut. Try and get square edge 4×4’s if you can. My wonderful Lowe’s only had 4×4’s with the radiused edges which made it a little more time consuming in laying out the notches.
Each 8’ 4×4 will have enough length to make one side of the bench frame. I just started at one end making the 30-degree cut first (which I think should be something different) and then you next piece is and 18” long 4×4 with two 15-degree angle cuts on it, followed by your last piece which is 36” long with a simple straight cut. These water logged timbers can be heavy. So its good to have a little help!


With the 4×4’s cut for each bench I laid the front leg and rear leg down on my garage floor against a straight edge (one of the 2×8’s) and separated them 11” apart. When I laid the cross member with the 30-degree angle cut on top of the legs I discovered that the 30-degree angle does not quote work as advertised so I had to slightly tweak the location where the cross member hits the front leg in order to make all of the legs line up. I made all of my cuts on a 10” sliding compound miter saw so I am pretty sure my angles are close. With the cross member on top of the legs you simply mark the notches with a pencil as shown on the web site. I used my speed square to help get amore accurate marking because of the rounded corners of the 4×4’s.
With the marks made its back to the bench to begin notching the 4×4’s. I used a circular saw, setting the depth of the saw to 1/2 the thickness of the 4×4. I made the left most & right most cuts first and then tried to space all the interior cuts to within a 1/4” or less of each other.

Below is a top view of what you get after you made the cuts, it does look a little un-neat, but it cleans up easily with a sharp chisel and a rasp.

With the grooves cut I turn the pre-notched pieces over to my assistant for the waste removal.

For those hard to pop out scraps we found that a small shovel does the trick!

With the bulk of the waste removed you are left with the rough cut masterpiece below.

It looks like a ton of work to clean up but it just looks a lot worse than it is. Clean up is a couple minutes with a good “sharp” chisel! The pressure treated pine cuts real easily.

More clean-up. I did all of the notches on one side prior to test fitting and fine tuning the joints.

My assistant test fitting a couple of the 4×4’s.

When all of the joints are fine tuned, just hammer the thing together and stand it up for the final step…The brush down.

Strangely enough we found that these make great seats on their own.

With what I would guess is the most challenging part of this project complete I decided to call it quits until tomorrow. Next up is bolting the sides together and adding the seat bottom and back. Maybe tomorrow.

Share this:

Another Garden Update

The Mountain Laurel was out in full force today around the yard, many blooms had just started to open up after the first day of sunshine following the left over rain from tropical storm Andrea.
The Fruit:


The Strawberries are flowering and we have several berries in development.

The smaller 3-year old plants that I transplanted last year are doing well, and I am glad to find out that I did not kill them by pruning them a bit this spring. As you can see in the above photo the blueberries have started to fruit!

Not sure of these are flower buds or developing Raspberries, but either way the wild Raspberries that Wen transplanted from our woods to the yard by the house seem to be thriving. The berry crop this year will be the true test!
All told we should have a good variety of fruiting crops this year so we will be keeping our fingers crossed.
The Veg:

This is the first year that we are seeing success with onion sets. We have tried the onions in a couple locations with no success until now. Located on the west side of our house they appear to be getting everything they need to thrive. The stalk diameter is growing with every week and it looks like we will be seeing one of the plants flower possibly this week. If this is anything like a garlic scape I will be cutting it off when it flowers to force the plant to focus its energy on root development, in lieu of flower production.

We are trying some tomato plants in 5 gallon buckets this year. So far so good…

The potato cages are back and filling out with greens. They are ready to have another layer of soil added to them.
We also have a larger planter box filled with potatoes ready for some more dirt.

The garlics is doing well. No garlic scapes yet! I am faithfully checking our garlic beds daily hoping for that first garlic scape to appear.

The bush beans are perking up.

We spread some nice organically dyed bark mulch this weekend to kind of clean some things up, and it provided some good contrast between the greenery we have planted out front!

Lastly some seedlings I stated a couple weeks ago have really popped. I cannot remember if the left side is Lupine or Echinacea but I planted both, and will be looking forward to transplanting these for some additional color around the house. Not sure if the timing will work or not but we will give it a go and hope that we will see some flowers this season from these seedlings.
Pretty exciting happenings around the yard and plantings are finally starting to ramp it up.
Share this:

About
A new homeowner, father, and husband chronicling his adventures in life.
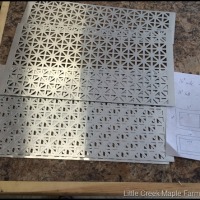
Upgraded topo with elevations 12-05-2013

Hard at work
Top Posts & Pages


Pinterest

Blogs I Follow